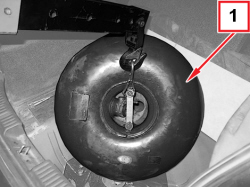
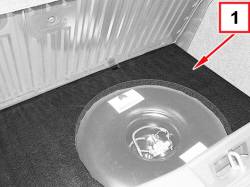
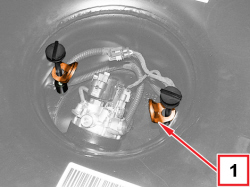
The tank must be disconnected only after draining all the LPG and having the tank inertised. To this purpose, placing the switch in LPG mode, make sure that the system automatically switches to petrol operation mode.
If the car cannot be run in LPG mode, before disconnecting the tank, drain all the LPG from the tank itself and inertise the tank complying with the prescriptions of the standard CUNA NC 120-01. Comply with the specific national regulations of the country where the car is sold.
For the Italian market, this intervention can only be carried out by personnel authorised to work on LPG systems, after participating in CEPAS training and getting the participation certificate.
If the necessary authorisation is not available, contact certified CEPAS workshops to have the tank drained and inertised. The tank can be removed from the vehicle only after this operation.
For the complete list of the workshops authorised to work on LPG systems, see www.ecogas.it.
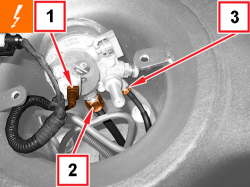
- Drain the pipe from the filler to the tank and the supply pipe from tank to pressure regulator, following the instructions and the procedure described below
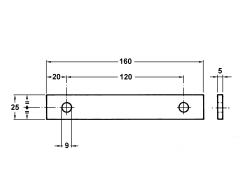
- Using a "flat" section iron, make a tool to raise the LPG tank, complying with the dimensions (mm) shown.
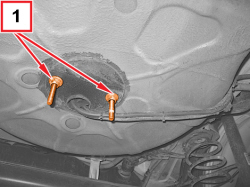
1. Fit the tool for raising the LPG tank made previously, using the screws for the LPG tank cover.
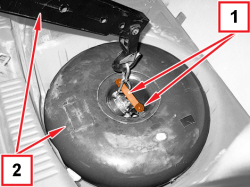
2. Connect a suitable hydraulic hoist as shown and partially raise the LPG tank.
1. Partially raise the LPG tank as shown.
- Rotate the LPG tank, then remove it from the luggage compartment and place it on a suitable mounting.
The LPG tank must be moved and positioned on mountings always keeping the multivalve stack facing upwards, complying with the assembly position in the car. Do not overturn.
Once removed, the LPG tank which has not been inertised must be left outside, in a safe place, sheltered from bad weather. Place a label on the LPG tank which has the following instructions: Do not touch - Do not overturn - No naked flames - No smoking - Do not use electrical equipment or heat lamps.
The LPG tank useful life is 10 years from its manufacturing date.
The LPG tank must be scrapped according to the regulations in force on dangerous waste.
- Place the LPG in position with the appropriate tool and a suitable hydraulic crane, inserting the filler pipe from filler to LPG tank through the pipe bushing.
- Remove the tools used to raise the LPG tank.
- Tighten the new bolts fixing the LPG tank to the body to the prescribed torque.
Component
Fixing
dia
Value (daNm)
Validity
LPG tank
Bolt (to be replaced)
M10
1.7 ÷ 2.3
1.4 16V TJet 120 HP
- Refit the supply pipe from tank to LPG pressure regulator, with reference to
The tank must be disconnected only after draining all the LPG and having the tank inertised. To this purpose, placing the switch in LPG mode, make sure that the system automatically switches to petrol operation mode.
If the car cannot be run in LPG mode, before disconnecting the tank, drain all the LPG from the tank itself and inertise the tank complying with the prescriptions of the standard CUNA NC 120-01. Comply with the specific national regulations of the country where the car is sold.
For the Italian market, this intervention can only be carried out by personnel authorised to work on LPG systems, after participating in CEPAS training and getting the participation certificate.
If the necessary authorisation is not available, contact certified CEPAS workshops to have the tank drained and inertised. The tank can be removed from the vehicle only after this operation.
For the complete list of the workshops authorised to work on LPG systems, see www.ecogas.it.
APPLIES TO VERSIONS WITH: Euro 5
- Drain the pipe from the filler to the tank and the supply pipe from tank to pressure regulator, following the instructions and the procedure described below
Fir two suitable brackets and fix them with the screws for the LPG tank cover.
APPLIES TO VERSIONS WITH: Euro 5
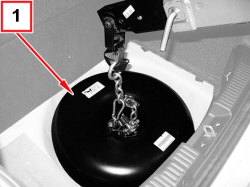
1. Using the brackets indicated above, connect a hydraulic hoist as shown in the figure, then partially lift the LPG tank, remove it from the luggage compartment and position it on a suitable mounting.
APPLIES TO VERSIONS WITH: Euro 5
The LPG tank must be moved and positioned on mountings always keeping the multivalve stack facing upwards, complying with the assembly position in the car. Do not overturn.
Once removed, the LPG tank which has not been inertised must be left outside, in a safe place, sheltered from bad weather. Place a label on the LPG tank which has the following instructions: Do not touch - Do not overturn - No naked flames - No smoking - Do not use electrical equipment or heat lamps.
The LPG tank useful life is 10 years from its manufacturing date.
APPLIES TO VERSIONS WITH: Euro 5
The LPG tank must be scrapped according to the regulations in force on dangerous waste.
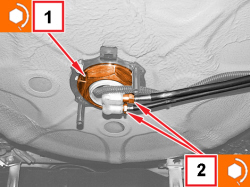
1. Tighten the LPG tank fixing ring nut to the prescribed torque.
Component
Fixing
dia
Value (daNm)
Validity
LPG tank fixing ring nut
Ring nut
M55
10.5 ÷ 11.6
1.4 16v TJet EURO 5
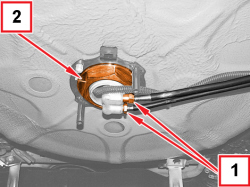
2. Connect the pipes to the LPG cylinder and tighten the connectors to the prescribed torque.
Component
Fixing
dia
Value (daNm)
Validity
Supply pipe from tank to LPG pressure regulator
Connector
-
1.1 ÷ 1.3
1.4 16V TJet 120 HP
Component
Fixing
dia
Value (daNm)
Validity
Filler pipe from filler to LPG tank
Connector
-
1.3 ÷ 1.5
1.4 16V TJet 120 HP
APPLIES TO VERSIONS WITH: Euro 5
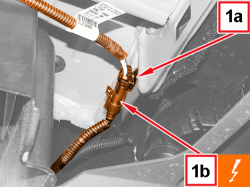
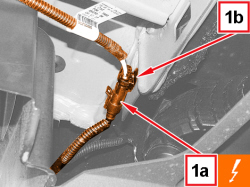
1. Connect the electrical coupling for the multifunction solenoid valve wiring on the LPG tank (1a) and fix it with the band (1b) indicated in the figure.
APPLIES TO VERSIONS WITH: Euro 5
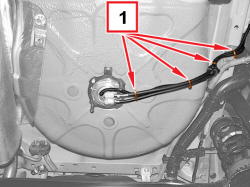
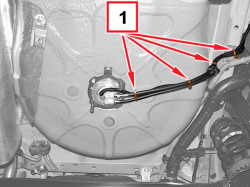
1. Engage the LPG pipes and the multifunction solenoid valve wiring on the LPG tank with the bands positioned as shown in the figure.
The tank must be disconnected only after draining all the LPG and having the tank inertised. To this purpose, placing the switch in LPG mode, make sure that the system automatically switches to petrol operation mode.
If the car cannot be run in LPG mode, before disconnecting the tank, drain all the LPG from the tank itself and inertise the tank complying with the prescriptions of the standard CUNA NC 120-01. Comply with the specific national regulations of the country where the car is sold.
For the Italian market, this intervention can only be carried out by personnel authorised to work on LPG systems, after participating in CEPAS training and getting the participation certificate.
If the necessary authorisation is not available, contact certified CEPAS workshops to have the tank drained and inertised. The tank can be removed from the vehicle only after this operation.
For the complete list of the workshops authorised to work on LPG systems, see www.ecogas.it.
APPLIES TO VERSIONS WITH: Euro 6
- Drain the pipe from the filler to the tank and the supply pipe from tank to pressure regulator, following the instructions and the procedure described below
Fir two suitable brackets and fix them with the screws for the LPG tank cover.
APPLIES TO VERSIONS WITH: Euro 6
1. Using the brackets indicated above, connect a hydraulic hoist as shown in the figure, then partially lift the LPG tank, remove it from the luggage compartment and position it on a suitable mounting.
APPLIES TO VERSIONS WITH: Euro 6
The LPG tank must be moved and positioned on mountings always keeping the multivalve stack facing upwards, complying with the assembly position in the car. Do not overturn.
Once removed, the LPG tank which has not been inertised must be left outside, in a safe place, sheltered from bad weather. Place a label on the LPG tank which has the following instructions: Do not touch - Do not overturn - No naked flames - No smoking - Do not use electrical equipment or heat lamps.
The LPG tank useful life is 10 years from its manufacturing date.
APPLIES TO VERSIONS WITH: Euro 6
The LPG tank must be scrapped according to the regulations in force on dangerous waste.
1. Tighten the LPG tank fixing ring nut to the prescribed torque.
Component
Fixing
dia
Value (daNm)
Validity
LPG tank fixing ring nut
Ring nut
M55
10.5 ÷ 11.6
1.4 16V TJet EURO 6
2. Connect the pipes to the LPG cylinder and tighten the connectors to the prescribed torque.
Component
Fixing
dia
Value (daNm)
Validity
Supply pipe from tank to LPG pressure regulator
Connector
-
1.1 ÷ 1.3
1.4 16V TJet 120 HP
Component
Fixing
dia
Value (daNm)
Validity
Filler pipe from filler to LPG tank
Connector
-
1.3 ÷ 1.5
1.4 16V TJet 120 HP
APPLIES TO VERSIONS WITH: Euro 6
1. Connect the electrical coupling for the multifunction solenoid valve wiring on the LPG tank (1a) and fix it with the band (1b) indicated in the figure.
APPLIES TO VERSIONS WITH: Euro 6
1. Engage the LPG pipes and the multifunction solenoid valve wiring on the LPG tank with the bands positioned as shown in the figure.

 Removing
(
Refitting
Removing
(
Refitting )
)