
 Removing
(
Refitting
Removing
(
Refitting )
)
Op. 7065C60 INTERIOR REAR VIEW MIRROR FOR VERSIONS WITH RAIN/DUSK SENSOR - R.R.
|
|
Removing
(
Refitting
)
Op. 7065C60 INTERIOR REAR VIEW MIRROR FOR VERSIONS WITH RAIN/DUSK SENSOR - R.R. |
|
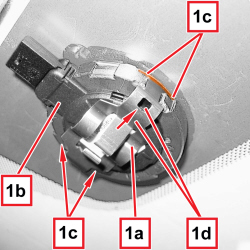  |
1. Remove the retaining clip (1a) for the sensor (1b) releasing the side hooks (1c), inserting a small screwdriver in the openings (1d). |
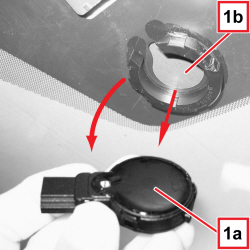  |
1. Remove the sensor (1a) from its housing (1b) on the windscreen, lifting the connector area and extracting it.
|
|
|
- If the same sensor must be refitted, proceed as follows: |
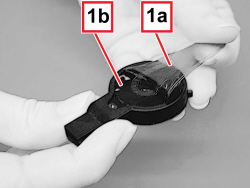  |
1. Remove the silicone pad (1a) on the sensor (1b) pulling with your fingers. Make sure that the silicone pad is completely detached. - Clean the sensor from fingerprints, dust or dirt, using an isopropyl alcohol detergent. |
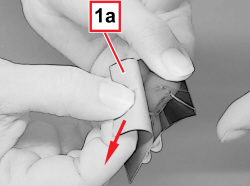  |
1. Take the new silicone pad and remove the yellow protective sheet (1a). |
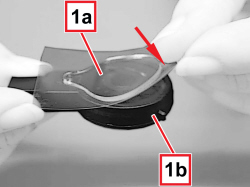  |
1. Position the silicone pad (1a) very carefully on the sensor (1b) checking that it is centred using the sensor's optical module. |
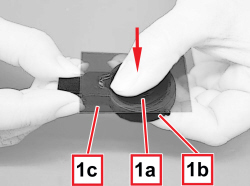  |
1. Press the entire surface of the silicone pad (1a) on the sensor (1b), working on the clear protective sheet (1c). |
|
|
Refitting
(
Removing
)
- Check that the rain sensor is not damaged. - Avoid touching the sensitive surface of the sensor. - Avoid the sensitive surface of the sensor coming into contact with dirt or fluids.
|
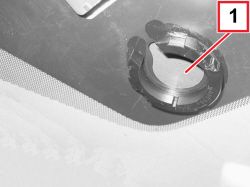  |
1. Clean the housing for the sensor on the windscreen thoroughly. Use a degreasing product. |
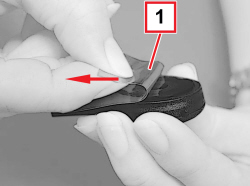  |
1. Remove the clear protective sheet. |
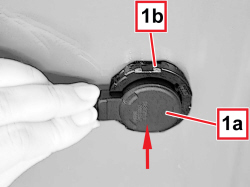  |
1. Immediately position the sensor (1a) in its housing (1b) on the windscreen.
|
|
|
- Position the new retaining clip for the sensor and engage the side hooks. Op. 7065C60 INTERIOR REAR VIEW MIRROR FOR VERSIONS WITH RAIN/DUSK SENSOR - R.R. |
|
