APPLIES TO VERSIONS WITH:
APPLIES TO VERSIONS WITH:
APPLIES TO VERSIONS WITH:
APPLIES TO VERSIONS WITH:
APPLIES TO VERSIONS WITH:


|
 Refitting
(
Removing Refitting
(
Removing )
)
|
|
Raccordo ingresso/uscita evaporatore |
Dado |
M6 |
0.7 ÷ 1.1 |
|
|
|
APPLIES TO VERSIONS WITH:
APPLIES TO VERSIONS WITH:
APPLIES TO VERSIONS WITH:
|
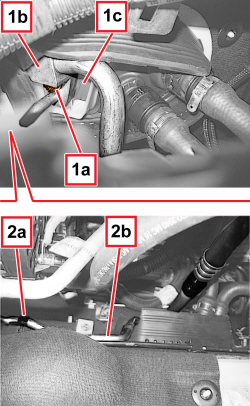
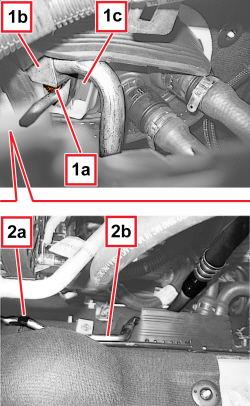
1. Undo the nut (1a) and disconnect the connector (1b) from the expansion valve (1c).

|
Seal the disconnected unions with suitable plugs to prevent moisture and impurities from entering the system.
|
|
|
APPLIES TO VERSIONS WITH:
|
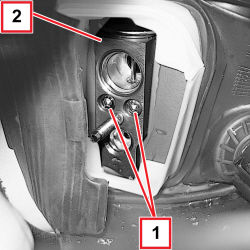
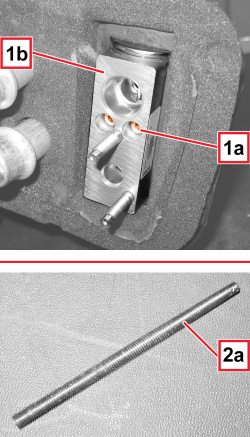
1. Undo the screws (1a) securing the expansion valve (1b).
2. Screw a threaded rod (2a) into the hole left by the removed screw (1a). The rod should be 10 - 12 cm long with the same thread as the removed screw.
|
|
APPLIES TO VERSIONS WITH:
|
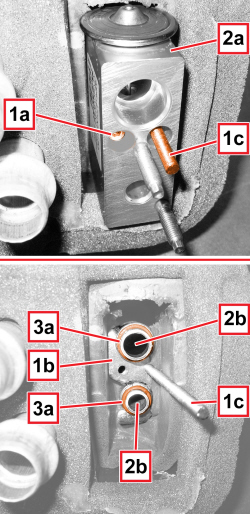
1. Undo the other screw (1a), using the threaded rod (1c) to hold the screw plate (1b) behind it in position.
|
|
During disassembly, make sure that the plate (1b) remains in position so that the expansion valve can be assembled correctly. Using just the threaded rod, it is not possible to reposition the plate (1b) if it turns out of position.
|
2. Remove the expansion valve (2a) by freeing it from the evaporator pipes (2b) and the threaded rod (1c).
3. Remove the expansion valve gaskets (3a) from the evaporator pipes.

|
Do not reuse the same gaskets (3a) when refitting.
|
|
|
APPLIES TO VERSIONS WITH:
APPLIES TO VERSIONS WITH:
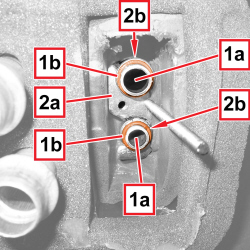
|
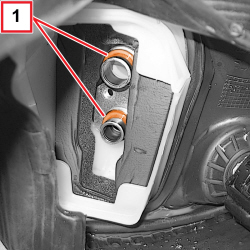
1. Fit the new expansion valve gaskets (1b) in place on the pipes (1a) of the evaporator. Moisten the outer surface of the gaskets (1b) with air conditioning system oil to facilitate fitting the expansion valve.
|
|
To moisten the seals (1b), do not use brushes or objects that may leave hairs and other impurities on their surfaces.
|
2. Check that the plate (2a) is in the correct position up against the flanges (2b) of the pipes (1a).
|
|
APPLIES TO VERSIONS WITH:
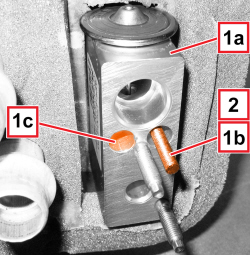
|
1. Carefully insert the expansion valve into position (1a), using the threaded rod (1b) to hold the plate in position up against the pipe flanges; with the plate held in position, insert an expansion valve fixing screw into the hole (1c).
2. Undo and remove the threaded bar (1b).
|
|
APPLIES TO VERSIONS WITH:
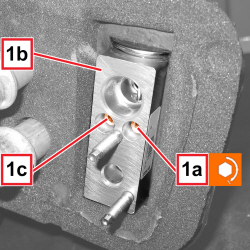
|
1. Tighten the screw (1a) securing the expansion valve (1b), then tighten both the screw (1a) and the screw (1c) the prescribed torque.
|
Expansion valve |
Screw |
- |
0.45 – 0.55 |
|
|
|
APPLIES TO VERSIONS WITH:
|
|
|
|
Replace the union O-rings. Only use seal washers with an elastomeric part in HNBR, resistant to refrigerant R1234YF. The use of seal washers with another elastomeric material may increase the risk of serious leaks of refrigerant from the air conditioning system.
|
|
|
APPLIES TO VERSIONS WITH:
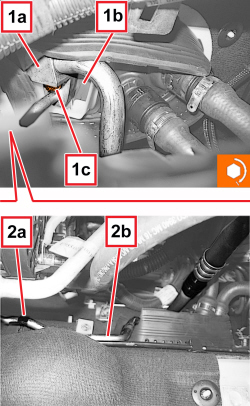
|
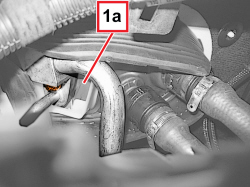
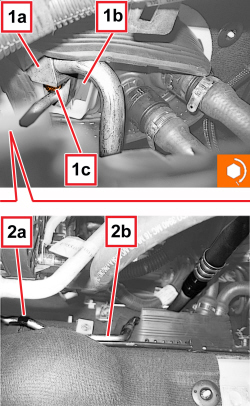
1. Connect the connector (1a) to the expansion valve (1b) and tighten the nut (1c) to the recommended torque.
|
Raccordo ingresso/uscita evaporatore |
Dado |
M6 |
0.7 ÷ 1.1 |
|
|
|
APPLIES TO VERSIONS WITH:
APPLIES TO VERSIONS WITH:
|
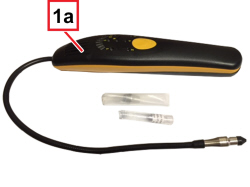
1. Start the engine and warm it up; then start the air conditioning system and check for absence of leakage of R1234yf, as described below with the following device (1a):
Electronic leak detector specifications:
- Sensitivity: < 7 g/y
- Measurement sensor technology: E_MOSTM
- Leakage detection less than 3 grams/year.
- Measurement probe: length 380 mm, diameter 6.4 mm
- Detects all CFC-HCFC-HFC-HFO refrigerant gases, also including hydrogen-ammonia-isobutane-propane-butane-LPG-acetone-benzene-ethanol
- Sensor duration: > 500 hours.
|
|
APPLIES TO VERSIONS WITH:
APPLIES TO VERSIONS WITH:
APPLIES TO VERSIONS WITH:
|
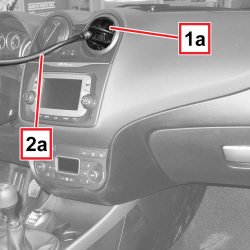
1. Close all the vents leaving open only the central vent (1a) of the dashboard.
- set the climate control unit distribution towards the open vent in “recirculation” mode and “minimum” fan speed.
2. Position the measurement equipment probe (2a) inside the central vent (1a) left open and then check that there are no leaks.
|
|
APPLIES TO VERSIONS WITH:
|
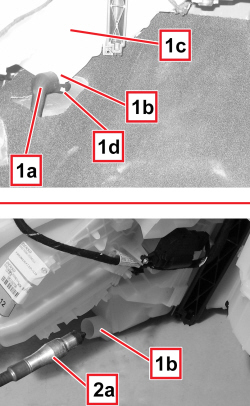
1. Position the measurement equipment probe (1a) inside the dryer filter compartment (1b) and then check that there are no leaks.
|
|
APPLIES TO VERSIONS WITH:
|
|
- Stop the compressor and repeat all the leak tests with the compressor off.
- After the checks:
|
|
APPLIES TO VERSIONS WITH: