
 Removing
(
Refitting
Removing
(
Refitting )
)
- Place the car on a lift.
|
|
Removing
(
Refitting
)
- Place the car on a lift. |
|
|
|
|
|
|
- Fold the rear seat cushion over. |
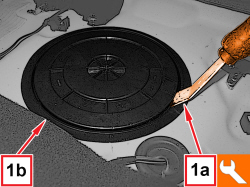  |
1. Insert the tool (1a) in the groove, lift and remove the access cover to the fuel pump assembly (1b).
|
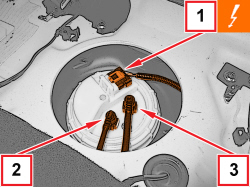  |
1. Disconnect the electrical connection for the fuel pump.
- Reduce the fuel pressure by starting the engine a few times. 2. Disconnect the rapid connector for the fuel supply pipe. 3. Disconnect the quick connector for the fuel return pipe. |
|
|
|
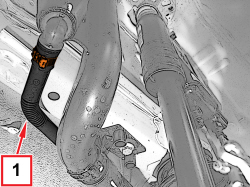  |
1. Loosen the band and disconnect the reflux pipe from the connector on the fuel filler pipe. |
|
|
- Seal the disconnected pipe appropriately. |
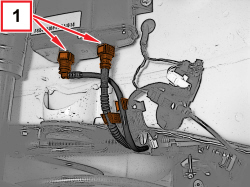  |
1. Disconnect the rapid connectors for the fuel vapour pipes from the canister and release them from the retaining clips. |
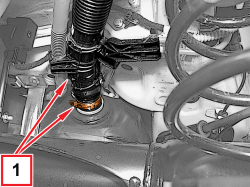  |
1. Loosen the band and disconnect the fuel filler pipe from the tank. |
|
|
- Seal the disconnected pipe appropriately. - Release the fuel vapour pipes from the intermediate retaining clips. |
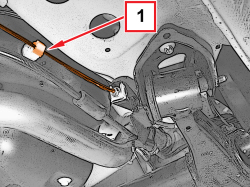  |
1. Open the left rear brake pipe retaining clip. |
|
|
- Position a hydraulic jack with a suitable support under the fuel tank. |
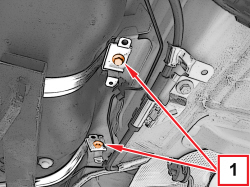  |
1. Undo the front bolts fixing the tank to the bodyshell. |
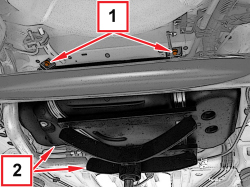  |
1. Undo the rear bolts fixing the tank to the bodyshell. 2. Lower the hydraulic jack slowly, release the pipes from the tank and then remove it. |
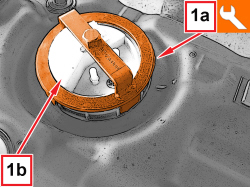  |
1. Fit the tool (1a), undo the ring nut securing the submerged pump assembly (1b) and remove it.
|
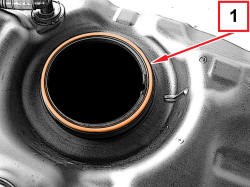  |
1. Remove the seal on the tank. |
  |
Refitting
(
Removing
)
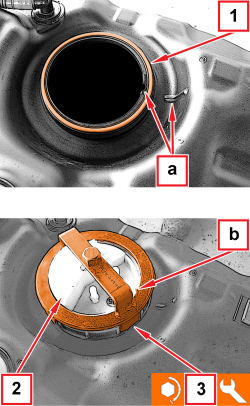
1. Fit a new seal ring on the fuel tank. 2. Place the submerged pump assembly in its housing taking care to ensure that the references (a) and (b) in the diagram are aligned. 3. Tighten the ring nut securing the submerged pump assembly to the prescribed torque using the tool and a suitable torque wrench.
|
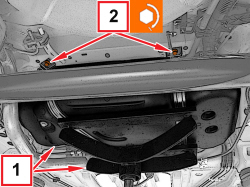  |
1. Using the hydraulic jack with a suitable support, place the fuel tank assembly in position. 2. Tighten the rear bolts securing the tank to the body to the specified torque.
|
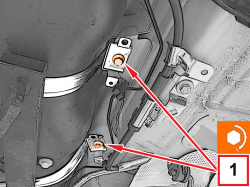  |
1. Tighten the front bolts securing the tank to the body to the specified torque.
|
|
|
- Remove the hydraulic jack. - Attach the rear brake pipes to the retaining clips on the tank. - Attach the fuel vapour pipes using the intermediate retaining clips. - Connect the fuel filler pipe to the tank and tighten the band. - Connect the rapid connectors for the fuel vapour pipes to the canister and close the retaining clips. - Connect the reflux pipe to the connector on the fuel filler pipe and tighten the band. |
|
|
|
|
|
- Connect the quick connector for the fuel return pipe. - Connect the rapid connector for the fuel supply pipe. - Connect the electrical connection for the fuel pump. - Close the access cover on the fuel pump assembly. - Place the rear seat cushion back in position. |
|
|
|
|
|
|
- Remove the vehicle from the lift. |
|
|
- Seal the disconnected pipe appropriately. |
