![]() ![]() |
Removing
(
Refitting
)
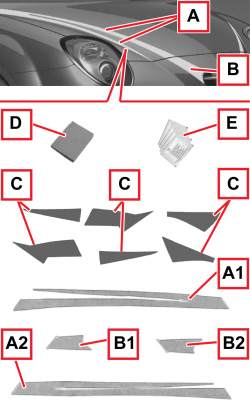
- The vehicle bodywork must be previously cleaned. 1. The kit of adhesive strips on the bonnet and front bumper is formed by: A: right adhesive strip (A1) and left adhesive strip (A2) for bonnet lid B: right adhesive strip (B1) and left adhesive strip (B2) for front bumper C: templates D: buffer for adhesive strip sticking E: cloths to clean the bodywork area concerned with the adhesion procedure (dipped in suitable 3M product) 2. This procedure describes the removing/refitting of the adhesive strip (B) on the front bumper. - For the removing/refitting of the adhesive strip (A), see the relevant procedure. Op. 7055C04 ADHESIVE STRIP ON SIDE FRONT BONNET (ONE), LH OR RH - R.R. |
![]() |
|
![]() ![]() |
Refitting
(
Removing
)
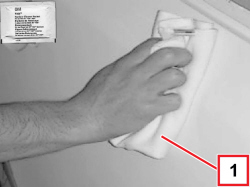
1. Clean the bodywork area where the adhesive strip is to be fitted with the cloth included in the kit. If the cloth is not included in the kit, clean the concerned bodywork area as follows. - Thoroughly clean and degrease, with denatured ethyl alcohol or isopropyl alcohol, the bodywork area where the adhesive strip is to be applied. - Wash the area with water then dry it. - Clean the area using heptane.
|
![]() ![]() |
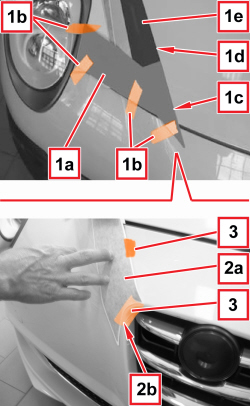
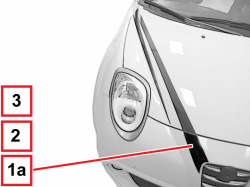
1. Make the adhesive strip section (1a) adhere to the bonnet, paying attention not to create bubbles or folds (keep the strip tensioned a bit). With the supplied buffer (1b), stick the adhesive strip working gently in the middle. 2. Progressively remove the lower protection film (2a) and make the adhesive strip (2b) adhere progressively, in the middle, using the buffer (1b). |
![]() ![]() |
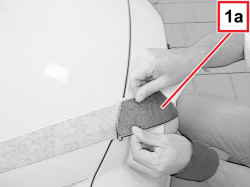
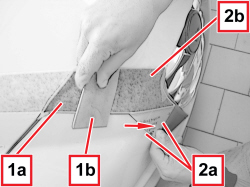
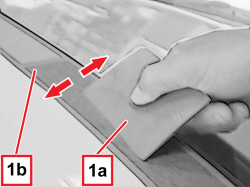
- Using the supplied buffer (1a), make the adhesive strip (1b) adhere fully, working gently from the middle towards the outer side and then from the middle towards the inside, as shown by the arrows (so that air can come out without creating any bubbles). Progressively work all the adhesive strip long. Exert a higher pressure on the adhesive strip perimeter. |
![]() ![]() |
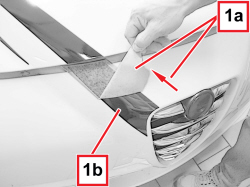
1. Progressively and gently remove the upper protecting film (1a) of the adhesive strip (1b).
|
![]() ![]() |
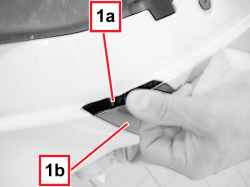
1. Open the bonnet lid, then fold and attach to the bumper angle the upper edge (1a) of the adhesive strip. |
![]() ![]() |
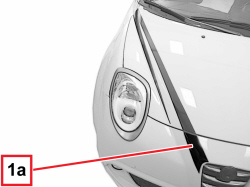
1. Check the correct adhesion of the adhesive strip (1a) for its whole length; make sure there are no air bubbles and remove them, if required, acting cautiously and gently with the supplied brush. |
|
|