





|






|
|
| Service News | ||
|
|
Alfa MiTo
All models |
|
|||
| 7005 1 741 PA |
POWER WINDOWS
Interference between front window glass and door weatherstrip moulding and/or hissing/whistling while driving - Service Solution |
|||

|
Cancels and replaces SN 70.08.08 of 26/09/2008 for the update of the Operating cycle and Time allowance. |
FAULT COMPLAINED OF
The Customer complains of one or both of the following faults:
-when one or both doors are opened, the window interferes with the moulding.-hissing/whistling while driving.TECHNICAL CAUSE
Incorrect positioning of the front window, interfering with the moulding.
OPERATIONS IN NETWORK
Network behaviour standards towards the Customer
-Once the claimed fault is confirmed, reassure the Customer that it can be solved by checking and adjusting the side window.-After the operation show the Customer what has been done and carry out a road test to make sure they are satisfied.Service Solution
If the claimed fault is confirmed check and adjust, if required, the window position as shown in the following Operating Cycle.
OPERATION CYCLE
-Apply adhesive tape on the upper edge of the window glass (1a - Fig. 1), at 140 mm from the rear corner, as shown.-Mark a line (1b - Fig. 1) on the outer side of the adhesive tape, 5.4 mm from the upper edge of the window (sinking distance of the window in the weatherstrip).-Apply adhesive tape on the upper edge of the window (2a - Fig. 1), at 1025 mm from the rear corner, as shown.-Mark a line (2b - Fig. 1) on the outer side of the adhesive tape, 4.5 mm from the upper edge of the window (sinking distance of the window in the weatherstrip).-Close the door.Fig. 1
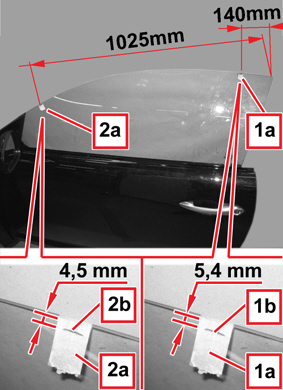
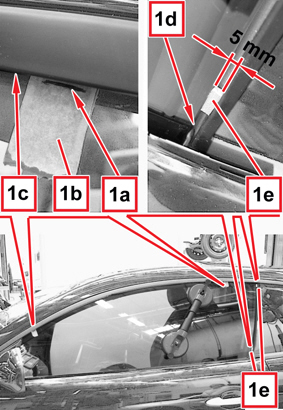
Fig. 2
If required, adjust the lowering glass position and sliding as follows:
-lift the glass scraper (1a - Fig. 3) starting from the rear edge, making sure not to strain it.-Remove the window scraper (1a) by releasing it from the rear view mirror support (2a).Fig. 3
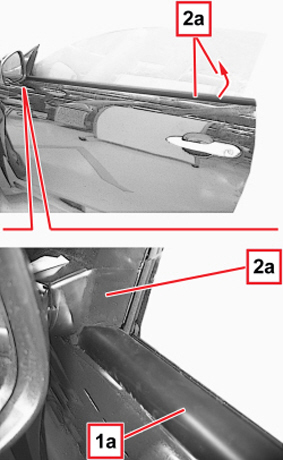
Fig. 4
Check the correct distance of 5 mm, between the window rear edge (3d) and the rear weatherstrip edge. For an easier adjustment of the window, fit two 5-mm shims (points 3e) between the window edge and the rear weatherstrip edge, as shown.
Fig. 5
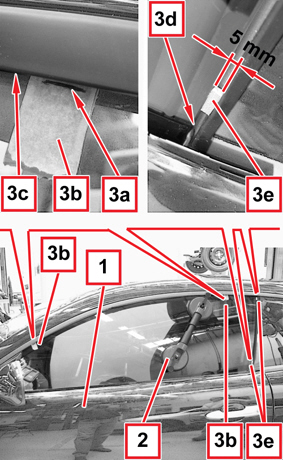
Fig. 6
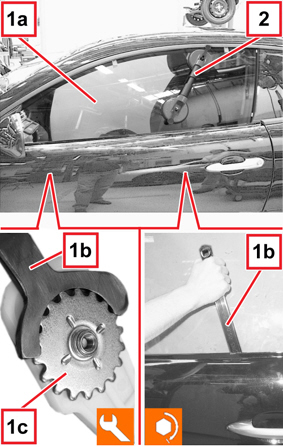
Check that the glass scraper is not damaged.
Engage the window scraper in the rear view mirror support then fit it in the seat gradually and carefully to prevent damaging it.
Move the door several times and check the automatic lowering of the window when the door is being opened and its automatic lifting after the door has been shut ("short drop" function).
The problem is considered to be solved when the window lowers sufficiently to be released from the door weatherstrip and perfectly adheres to the rear weatherstrip.
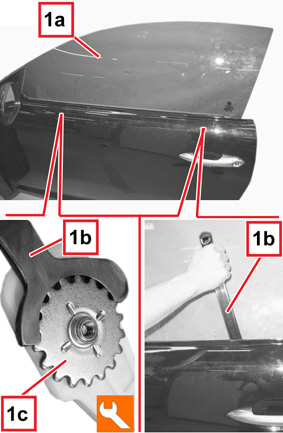
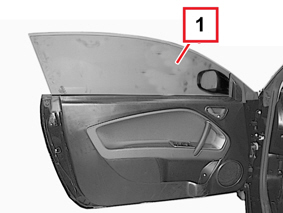
-Move the lowering window (1 - Fig. 7) until it is in the open or closed end of travel position, checking that it slides evenly without sticking.Then check the position of the window with the door both open and shut, then lift the window to the closing end of travel position.
Fig. 7
CLAIM REPORT DATA
|
Version |
Operation |
Piece |
Fault |
Position |
Time allowance |
|
All models in question |
7005174 |
1 |
PA |
010 - 090 |
0.30 |